
”Discover effortless natural waves for every hair type with these 7 heatless techniques. From braids to scrunching, get beautiful wavy hair without damage. Read more!”
Do you dream of waking up with gorgeous, tousled waves but feel like your hair type is working against you? Maybe you’ve spent hours with a curling iron only to have the waves fall flat within an hour. Or perhaps you’ve accepted that your straight hair will never hold a curl, or that your curly hair is just “too much” to manage into beachy waves.
Here’s the truth: effortless natural waves for every hair type are absolutely achievable-and you don’t need a single hot tool to get them. Whether your hair is pin-straight, wavy, curly, fine, or thick, there’s a heatless technique that will give you the soft, lived-in waves you’ve been craving.
In this guide, I’ll walk you through seven foolproof methods tailored to different hair types. You’ll learn exactly which products to use, how to prep your hair, and how to make your waves last for days. Say goodbye to heat damage and hello to healthy, beautiful wavy hair!
: Why Heatless Waves Are Better for Your Hair (and Your Sanity)

Let’s be real-heat styling is a time-suck. Between the heating time, the sectioning, the risk of burning yourself, and the inevitable frizz, it’s exhausting. But beyond the frustration, heat damage is real. Repeated exposure to high temperatures breaks down your hair’s protein structure, leading to dryness, breakage, and split ends.
Going heatless isn’t just a trend-it’s genuinely better for your hair. When you skip the tools, your hair retains more of its natural moisture, elasticity, and shine. Plus, you’ll save so much time in your morning routine!
The best part? Heatless techniques actually work with your natural texture instead of fighting against it. Whether you have naturally wavy hair that needs a little encouragement or straight strands that need help holding a shape, these methods will give you results that look effortlessly beautiful-because they are effortless.
Pin-Worthy Tip: “The secret to perfect heatless waves is working with your hair’s natural texture, not against it. When you embrace what your hair already wants to do, styling becomes so much easier!”
: The Foundation: How to Prep Your Hair for Perfect Waves
Before we dive into the techniques, let’s talk about prep. This is the step most people skip, and it’s exactly why their waves fall out by lunchtime.
Start with damp hair. Not soaking wet, not completely dry. Aim for about 70% dry-your hair should feel slightly damp to the touch. If your hair is too wet, it won’t dry fully overnight. If it’s too dry, it won’t hold the wave pattern.
Apply a styling product before you start shaping. This is non-negotiable if you want waves that last. Think of it as the foundation for your style:
- Sea salt spray or texturizing spray adds grip and grit so your hair actually holds a shape. This is a game-changer for straight or fine hair.
- Curl-enhancing mousse gives more structured definition and works particularly well for fine hair that needs extra support.
- Curl cream or leave-in conditioner is ideal for thicker or coarser hair that needs moisture to form smooth, frizz-free waves.
Pro tip: Apply your product from mid-lengths to ends, avoiding the roots to prevent your hair from looking greasy.
Pin-Worthy Tip: “The difference between waves that last two days and waves that fall out before lunch? It’s all in the prep. Never skip your styling product!”
: Method 1: Overnight Braids (Best for All Hair Types)
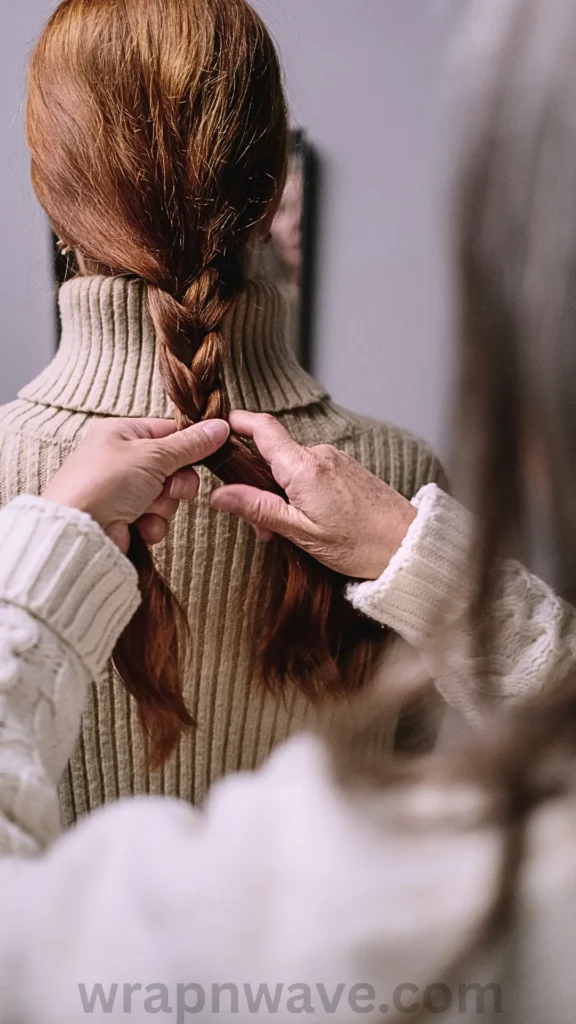
This is the most popular heatless wave method-and for good reason. It works for absolutely everyone.
How to do it:
- Start with damp, product-coated hair.
- Divide your hair into sections. For soft, subtle waves, use 2-4 braids. For tighter, more defined waves, use 6-8 smaller braids.
- Braid each section loosely for relaxed waves or tightly for more structure.
- Secure with soft scrunchies to avoid creases.
- Sleep on it! In the morning, gently undo the braids and finger-comb through your hair.
Important: Don’t use a brush to undo your braids-it will create unwanted frizz. Use your fingers to gently separate the waves, then finish with a light spritz of sea salt spray or flexible hairspray.
This method is incredibly versatile. If you have straight hair, it will create beautiful, long-lasting waves. If you have naturally wavy hair, it will enhance and define your existing texture. c
Pin-Worthy Tip: “The looser the braid, the more relaxed the wave. The tighter the braid, the more structured the curl. Adjust based on your desired look!”
: Method 2: The Twist and Pin Method (Best for Straight or Fine Hair)

If braids don’t give you the wave pattern you want, try the twist and pin method. This technique creates beautiful, ribbon-like waves that look like they came from a curling wand-minus the heat.
How to do it:
- Start with damp, product-coated hair.
- Take a small section of hair and twist it tightly from root to tip.
- Coil the twisted section into a small bun and secure it against your scalp with a bobby pin.
- Repeat all over your head.
- Let your hair dry completely (overnight works great), then release the twists.
This method is especially effective for straight or fine hair because the tight twisting creates a more defined wave pattern that holds well. The results are stunning-soft, bouncy waves with lots of movement.
Pin-Worthy Tip: “For a more natural look, alternate the direction of your twists-twist some sections away from your face and others toward your face”.
: Method 3: Scrunch and Air-Dry (Best for Naturally Wavy or Curly Hair)

If you already have wavy hair or curly hair, you might not need to braid or twist at all. Sometimes, all your hair needs is a little encouragement to do its thing.
How to do it:
- After washing, gently pat your hair dry with a microfiber towel-never rub! Rubbing causes frizz.
- Apply your styling product (sea salt spray, mousse, or curl cream) to damp hair.
- Flip your head upside down and scrunch your hair upwards toward your scalp.
- Let your hair air-dry completely. Avoid touching it while it dries-this prevents frizz and keeps your waves defined.
For extra definition, you can try “plopping”: wrap your damp, product-coated hair in a cotton t-shirt or microfiber towel to help your waves form as they dry.
This method is perfect for those days when you want to embrace your natural texture with minimal effort. The key is using the right products for your specific wave type-lighter products for finer waves, richer products for thicker, coarser waves.
Pin-Worthy Tip: “The secret to frizz-free waves? Don’t touch your hair while it dries! Let it do its thing, and you’ll be amazed at the results.”
: Method 4: The Headband Method (Best for Fine or Straight Hair)

This vintage technique is making a huge comeback-and for good reason. It creates gorgeous, Old Hollywood-style waves without any heat.
How to do it:
- Start with slightly damp, product-coated hair.
- Place a stretchy headband around your head like a crown.
- Take small sections of hair and wrap them around the headband, tucking the ends under.
- Repeat until all your hair is wrapped around the headband.
- Let your hair dry completely (overnight works best), then gently unwrap and finger-comb.
The headband method creates soft, flowing waves that are especially flattering on fine or straight hair. It’s also incredibly comfortable to sleep in-much more comfortable than braids or twists!
Pin-Worthy Tip: “The headband method gives you glamorous, heatless waves while you sleep. It’s like waking up with red-carpet hair!”
: Method 5: The Sock Bun (Best for Long Hair)

If you have long hair, the sock bun method is a game-changer. It creates beautiful, cascading waves that look like you spent hours with a curling wand.
How to do it:
- Start with slightly damp, product-coated hair.
- Put your hair into a high ponytail.
- Take a clean sock (or a donut bun maker) and roll your ponytail around it, creating a bun.
- Secure with a soft scrunchie.
- Let your hair dry completely, then release the bun and gently separate the waves.
This method is especially effective for creating waves that start higher up on your head, giving you more volume at the roots. It’s also a great option if you want to protect your ends while you sleep.
Pin-Worthy Tip: “The higher the ponytail, the more volume you’ll get at the roots. For extra lift, position your bun right on top of your head!”
: How to Make Your Waves Last for Days
You’ve put in the work to create beautiful waves-now let’s make sure they last! Here are my top tips for keeping your wavy hair looking fresh:
- Sleep on a silk or satin pillowcase. This reduces friction and prevents frizz while you sleep.
- Use the “pineapple” method at night. Gather your hair into a loose, high ponytail on top of your head to preserve your waves while you sleep.
- Refresh with water and product. In the morning, lightly mist your hair with water and scrunch to revive your waves. Add a tiny bit of curl cream or sea salt spray if needed.
- Avoid brushing. Brushing will turn your beautiful waves into a frizzy mess. Use your fingers or a wide-tooth comb instead.
- Use a lightweight hair oil. A few drops of hair oil can help redefine your waves and add shine without weighing them down.
With these tips, your waves can easily last 2-3 days-sometimes even longer!
Pin-Worthy Tip: “The pineapple method is a game-changer for preserving your waves overnight. A loose high ponytail = frizz-free waves in the morning!”
: The Best Products for Effortless Natural Waves
The right products can make or break your wave game. Here are my top recommendations based on your hair type:
For straight or fine hair:
- Lightweight sea salt spray for texture and grip
- Volumizing mousse for body and hold
- Avoid heavy creams-they’ll weigh your hair down
For naturally wavy hair:
- Curl-enhancing mousse or foam for definition
- Lightweight leave-in conditioner for moisture
- Sea salt spray for added texture
For curly hair:
- Curl cream or styling cream to define and smooth
- Rich leave-in conditioner for hydration
- Curl jelly for hold and frizz control
For thick or coarse hair:
- Curl styling creams or jellies to manage volume and frizz
- Rich leave-in conditioners for moisture
- Hair oil for shine and smoothness
[INTERNAL LINK: related article about best hair care products for wavy hair]
Pin-Worthy Tip: “The best product for your waves is the one that works with your hair type. Don’t be afraid to experiment until you find your perfect match!”
: Embracing Your Natural Texture
Here’s the thing about effortless natural waves for every hair type: the goal isn’t to transform your hair into something it’s not. The goal is to enhance what you already have.
Whether you have loose 2a waves, defined 2c waves, or tight curls that you want to stretch into beachy waves, the techniques in this guide will help you achieve a look that feels authentically you.
The beauty of heatless waves is that they’re supposed to look a little imperfect. That undone, “I just came from the beach” vibe is what makes them so appealing. So don’t stress if every wave isn’t perfectly uniform-that’s actually the goal!
Remember, healthy hair is always more beautiful than perfectly styled hair. By ditching the heat tools and embracing heatless techniques, you’re not just saving time-you’re giving your hair the love and care it deserves.
Pin-Worthy Tip: “Perfectly imperfect waves are the goal! Embrace the natural texture of your hair and let your unique wave pattern shine through.”
Conclusion
Getting effortless natural waves for every hair type is easier than you think. Whether you choose overnight braids, the twist and pin method, scrunching, the headband technique, or the sock bun, there’s a heatless method that will work for your unique hair type.
The key takeaways? Start with damp hair, always use a styling product for hold, and be patient while your hair dries. With a little practice, you’ll be able to create gorgeous, heatless waves that last for days-without damaging your hair or spending hours in front of the mirror.
Your hair deserves to be healthy, beautiful, and full of life. And now you have all the tools you need to make that happen!
CTA
Ready to transform your hair routine? Try one of these heatless wave methods tonight and wake up to gorgeous, effortless waves tomorrow! Which method are you most excited to try? Drop a comment below and let me know—I’d love to hear about your results! And don’t forget to save this post to your Pinterest boards so you can come back to it anytime you need a wave refresher. Let’s get those conversations started!
Pin Description
Love effortless natural waves for every hair type? ✨ This guide shows you 7 heatless techniques for gorgeous wavy hair-whether you’re straight, wavy, or curly! Save this for your next wash day! #NaturalWaves #HeatlessHair #WavyHair #HealthyHair #BeachWaves